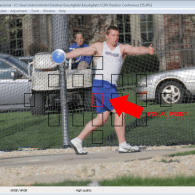
A while back I posted on Facebook asking what people were struggling with the most. Scott Anderson responded to the question saying that he was having problems with extractions. He even offered to send me a photo to see if I could help him.
Sometimes these issues get complicated! So I ended up giving some photography tips as well as creating the video below on what I would do with a photo like the one he sent me. I hope you enjoy this post and video. I would love to hear your thoughts below in the comments area.
Extraction challenge with the photo:
- The main issue with extracting this photo is that it’s out of focus, causing the edges to be harder for the quick selection tool to differentiate.
- Sharp images are much easier to select with the quick selection tool.
For my templates, I use lots of stock images, so I have a pretty easy time extracting the images. For demonstration purposes and posting to the web it doesn’t have to be perfect. For print you have to up your game in looking at the detail of the extraction and the ability to “sell the illusion”.
Time to Call the Expert
I called upon my friend, Jeff, to take a look at this photo and give me some insights. Jeff is really into the technical side of photography and he’s up on all the latest greatest information; that being said he’s an excellent resource.
The first thing Jeff did was analyze the photo in DPP. DPP software (Digital Photo Professional) ships with Canon digital SLR cameras. I’m posting the info from the DPP below. One of the things I really like about the DPP is that it can show you where the focal point was positioned.
Click to see larger:
Jeff’s thoughts and tips:
- This image was shot with a Canon 7D. This is a camera with great capabilities capturing excellent images at up to ISO 12800 and speeds of up to 8.0 fps. Kudos for that!
- Get out of Manual mode and into Aperture priority mode (AV mode). The 7D does not have Auto ISO, so shoot in AV and set the F-stop as low as it will go. Looks like you have already done in this photo.
- Move to get a better background, if you can’t do that, get a 2.8 lens and use the depth of field to remove the background, as the people are quite distracting.
- The lens looks REALLY soft and that camera is VERY capable of producing very sharp images. It is possible that a different lens would do a better job. The 70-200 f2.8 Canon lens does a stellar job. I know theses lens are expensive but photos that are out of focus remind me of why I’m a lens snob. 🙂 This image was shot with a Sigma 170-500.
- Update the firmware in your camera. 2.0.5 is available now and has been since December 2013. This update features major improvements to it with that version. Find a video online on how to update firmware if you need help. Here is a link to the instructions on Canon’s site.
- Another thing to mention, and I just Googled it to be sure: typically discus is shot close and wide. Google “discus throw photos”.
Additional training Jeff recommends Kelby Training’s: Peter Read Miller, Dave Black, Scott Kelby Courses.
Video Tutorial Resources:
- Layered Backdrops Vol 4
- Topaz Adjust
- Rad Lab
- Extraction Sources and Reviews
- Snap Art 4
- Extraction Videos
Thank you, Jeff, for all of your insights and for taking the time to review this photo for me. Also, thank you, Scott, for asking your question and sending in your photos.

1 Response to "Secrets of Difficult Photoshop Extractions"
Hi everyone, I’m the Jeff from Kim’s post above… 🙂 Glad to see the comments!
James, the function you’re talking about tends to be on higher level cameras, the 7D did not have that option when this photo was taken (I can’t remember if the new firmware update added that…)… that said, there’s a tradeoff with that “feature”… that tradeoff being if your camera doesn’t think it has the focus, it won’t fire… sometimes that means you missed THE shot… so you’ve got to make the decision if a soft photo but the peak action is “better” than a sharp one… I tend to agree with you, I love sharp but I also want to make sure I get “the shot”… the joys of all the compromises of photography!!
Scott, Yes absolutely the 2X and the 1.4X converters are good alternatives (that was very Canon of me, sorry… Nikon also makes a 1.7 that is very good…)… and I dare say that they may be even better alternatives in some cases. The issue with converters is sharpness (you’re adding glass between your subject and the sensor… they’re still sharp, just not quite as sharp as without) and a loss of 1 stop (1.4x) or two (2X) of light so your depth of field is also deeper. I shot little league tournaments for four years with the 70-200 and the 2X during the day and dropped the 2X at night for the extra two stops of light (less reach but I could still shoot at night…)…. now I shoot the tournaments with the 300mm 2.8 which is limiting because you loose the zoom capability so your feet become the zoom which isn’t always possible when you’re limited with space… so yet again a compromise you need to make with your gear/photography. In the case of the converter, rent one to try if you’re not sure. If you are happy with the results then pick one up and shoot away!